(Click here to download my custom yEd palette)
I like to encourage the use of visual aids for talking and thinking about even slightly complicated topics, and causal diagrams are my favorite type of visual aid. For bigger diagrams, it’s nice to be able to draw them on a computer that allows you to move around and easily edit objects.
There’s a free, cross-platform diagramming program called yEd which is great for this purpose, so I made these instructions to help streamline the technical aspects of learning and using yEd to make causal diagrams.
Step 1. Download and install yEd.
The latest version when I wrote this was 3.9.2.
Step 2. Configure for easier causal diagramming
(Watch the 5-minute video above for a walk-through.) The following steps should help streamline the process of drawing causal diagrams:
- Free up screen space. Minimize (“autohide” in the Windows version) all the small windows at the left of the editor, i.e. “Overview”, “Neighborhood”, “Folder Contents”, “Predecessors”, and “Successors”. Note that you can go to Window -> Reset Layout at any time to restore the original window locations.
- Turn on “dynamically adjust node size to label size”, under File -> Preferences -> Editor. This works almost as expected, except you also need to…
- Disable the “ignore height” option under Tools -> Fit Node To Label. This should save you the trouble of manually resizing nodes to fit the text inside them.
- Sort the most useful palettes to the top. Go to Edit -> Manage Palette. In the right column, select “Current Elements“, and click the UP arrow to move it to the top. Then move “Shape Nodes” to second from the top, and “BPMN” to third from the top.
- Download my custom palette consisting of my favorite objects for drawing causal diagrams.
- Install the custom palette. Go to Edit -> Manage Palette, click “Import Section” at the left, and choose the critchs-favorite-objects.graphml file you just downloaded. A palette called “critchs-favorite-objects” should appear in the right column; click it, and click the UP arrow to move it to the position second from the top.
Step 3. Try it!
To get a sense of what yEd can do, try making a diagram that looks just like this:
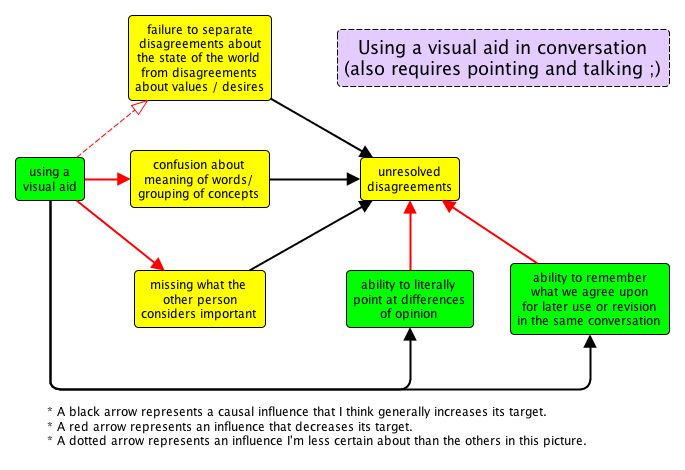
All the objects in this diagram are from the critchs-favorite-objects palette you just installed, so it should be fairly quick to draw once you get the hang of things. You can download the yEd file that generated this image and open it in yEd if you want to play around with it.